Bundling and Pushing a Theme
Confirm dependencies
If you have customized a theme originally downloaded from the BigCommerce Theme Marketplace: Before you package your theme, make sure your theme directory includes all the dependencies that BigCommerce requires for submission.
Follow the link for your scenario:
If you downloaded a refreshed version of Stencil's default Cornerstone theme: Run npm install in the theme directory to install refreshed JavaScript dependencies, as outlined in Installing Stencil.
No automatic check for dependencies
The stencil bundle and stencil push commands do not check for the dependencies that these build systems install. So if those dependencies are missing, these commands will not immediately report errors. However, your resulting .zip file will not properly upload to BigCommerce, and will not run properly on a storefront.
Verify directory and file permissions
If you have added any new subdirectories or files to your base theme, verify that you have:
- Set newly added directories to permission
755(drwxr-xr-x). - Set newly added files to permission
644(rw-r--r--).
Bundling your theme
Once you have verified the requirements above, you are ready to process and package your theme for upload to BigCommerce. Stencil CLI provides two options for creating a zip file that contains all of your theme's essentials while excluding redundant components. The options are either only bundling your theme, or bundling and pushing your theme. These options are available depending on how you've authorized your theme:
Bundle only
The stencil bundle command bundles your theme into a zip file which may be uploaded to a BigCommerce store.
The bundle command will notify you of its progress and completion, as well as any errors that prevent bundling.
Check/Adjust zipfile's size
Check the resulting zip file's size before you proceed. The zipped bundle should be only a few megabytes. BigCommerce imposes a hard limit of 50 MB, and any file size approaching that is problematic. If your zip file fits comfortably within the size limit above, jump directly to Pushing Your Theme. However, if your zip file approaches or exceeds 50 MB, you must first use one of these procedures to restructure your theme to a manageable size for upload to BigCommerce:
- Shrinking Your Theme by Excluding Static Assets (WebDAV) (opens in a new tab)
- Staging a Theme for CDN Delivery (opens in a new tab)
Bundle and push
The stencil push command is available only for themes that you have successfully initialized using a Stencil CLI token (opens in a new tab) (with Themes: modify scope). This command bundles your theme and uploads it to the associated store, in one continuous process.
For further requirements and usage details, please see the Command-Line Upload in Pushing Your Theme below.
For file-size error diagnostics and workarounds, please Check/Adjust Zipfile's Size above.
Software requirements / resolving lint errors
-
Only use the
stencil bundleor thestencil pushcommand to process and package themes for submission. These commands generate.zipfiles that match BigCommerce's expected structure. They also generate metadata required for your theme to function properly. -
Do not create
.zipfiles using general-purpose archiving software. The resulting files will trigger errors upon upload to BigCommerce. -
Do not open a bundled theme zip file to add, delete, rename, or update files. Doing so will make your theme unusable in the production store.
-
If bundling your theme triggers multiple lint errors related to the
bundle.jsfile, then your theme is missing the.eslintignorefile. Please retrieve this file from the Stencil Cornerstone repo (opens in a new tab), then re-runstencil bundleorstencil push.
Pushing your theme
BigCommerce provides two alternatives for uploading a theme to its associated BigCommerce store. You can perform either a control panel upload, or a command line upload. These options are available depending on how you've authorized your theme:
Control Panel upload
To upload your theme to a store using the BigCommerce Control Panel, first use stencil bundle to package your theme into a zip file. Prepare your file according to the instructions in the Bundle only section.
For the Control Panel's upload steps, see the Uploading Custom Themes (opens in a new tab) article in our Knowledge Base.
For error codes that you might encounter when uploading a theme – and corresponding workarounds, see Troubleshooting Theme Uploads.
Command line upload
The stencil push command allows you to bundle your theme and upload it to the store, with a single terminal command. To run stencil push, you must first:
Successfully initialize your theme using a Stencil CLI token (opens in a new tab) that you created with the Themes: modify scope.
Install Stencil CLI version 1.12.0 or higher.
To check your current Stencil CLI version, enter stencil --version or stencil -V on the command line. If you need to update an earlier version, reinstall Stencil CLI.
Pushing a theme
To initiate bundling and pushing, enter the following on the command line:
stencil push
Stencil CLI displays the same notifications, prompts, and selection options you would receive when using the control panel's GUI. The following sections will describe the notifications and interactions you might see.
To push a theme and activate a particular variation without being prompted, use stencil push -a VARIATION_NAME with the name of the variation. For example, stencil push -a Light will activate the "Light" variation. If you simply use stencil push -a without a variation name, the first variation will be applied.
To push a theme and apply it to selected channels, use stencil push -a -c 123 456. To apply a theme to all available channels, use stencil push -a -allc.
If you are already at your theme limit, you can automatically delete the oldest theme on your store using stencil push -d. You can use the combination, stencil push -a -d, to give the best chance of the upload working without any interaction, which is desirable for automated deployments of Stencil CLI.
Successful bundling
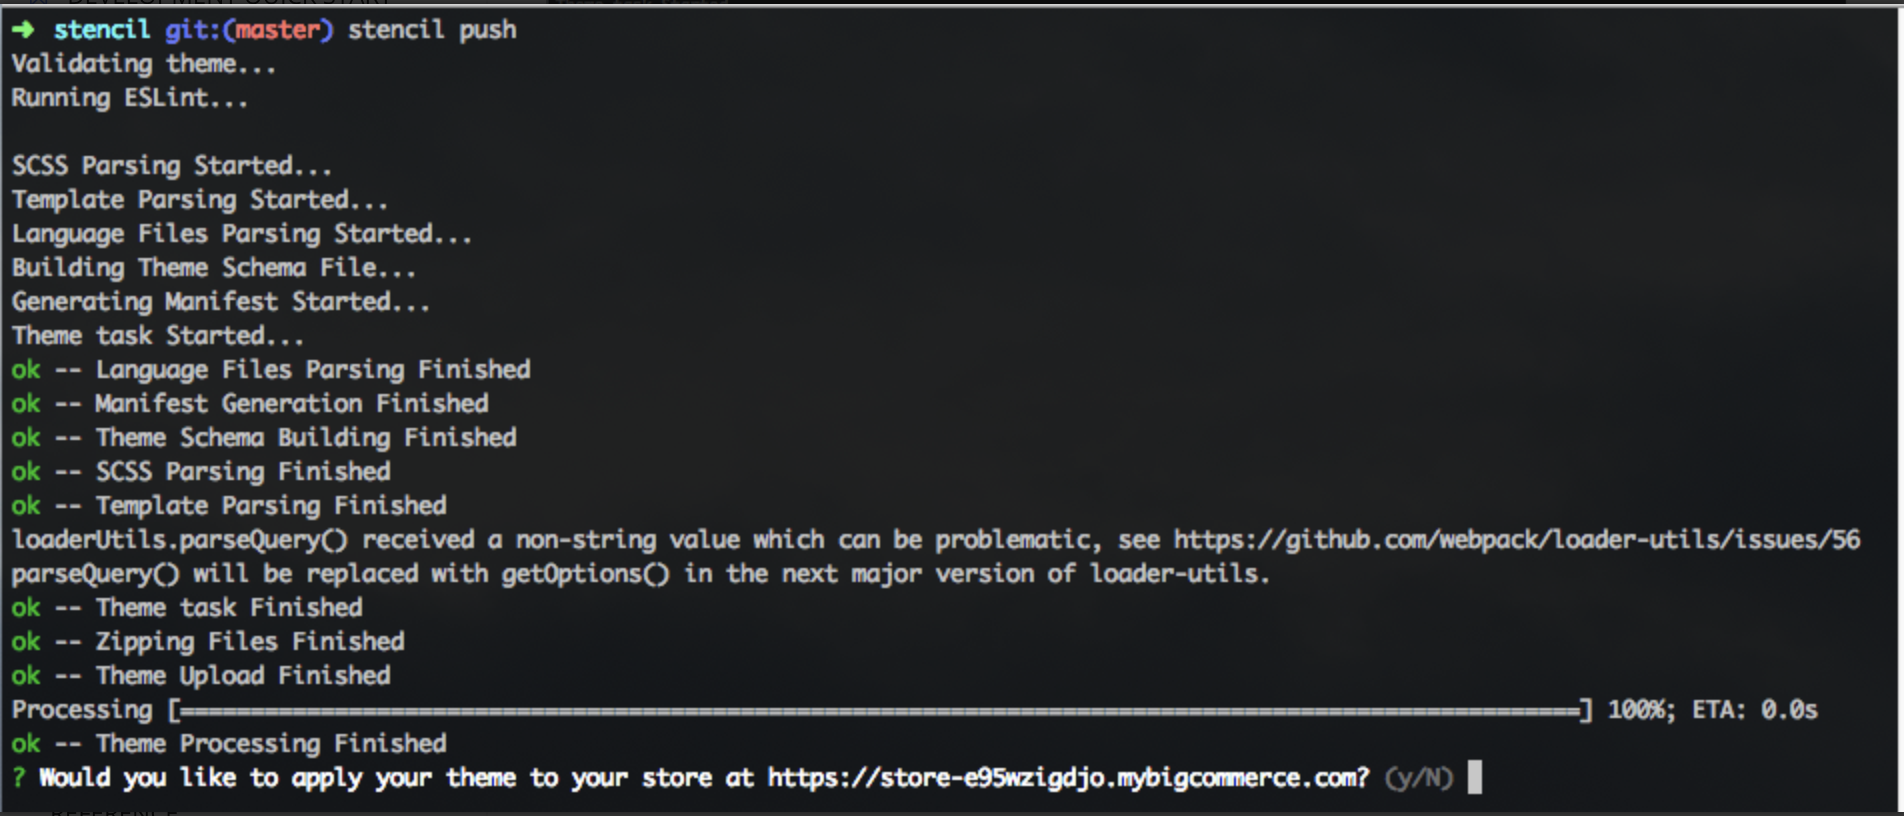
Stencil CLI will display ok confirmations, or not ok errors, or warnings for individual substeps in bundling and uploading your theme. If bundling is successful, you will next see a Processing progress bar to track the upload.

Successful upload
Upon successful upload, you will receive the prompt, Would you like to apply your theme to your store at <storehash>? (y/N). Any response except y or Y processes as "No." You can always apply the theme later through the control panel.
Apply which variation?
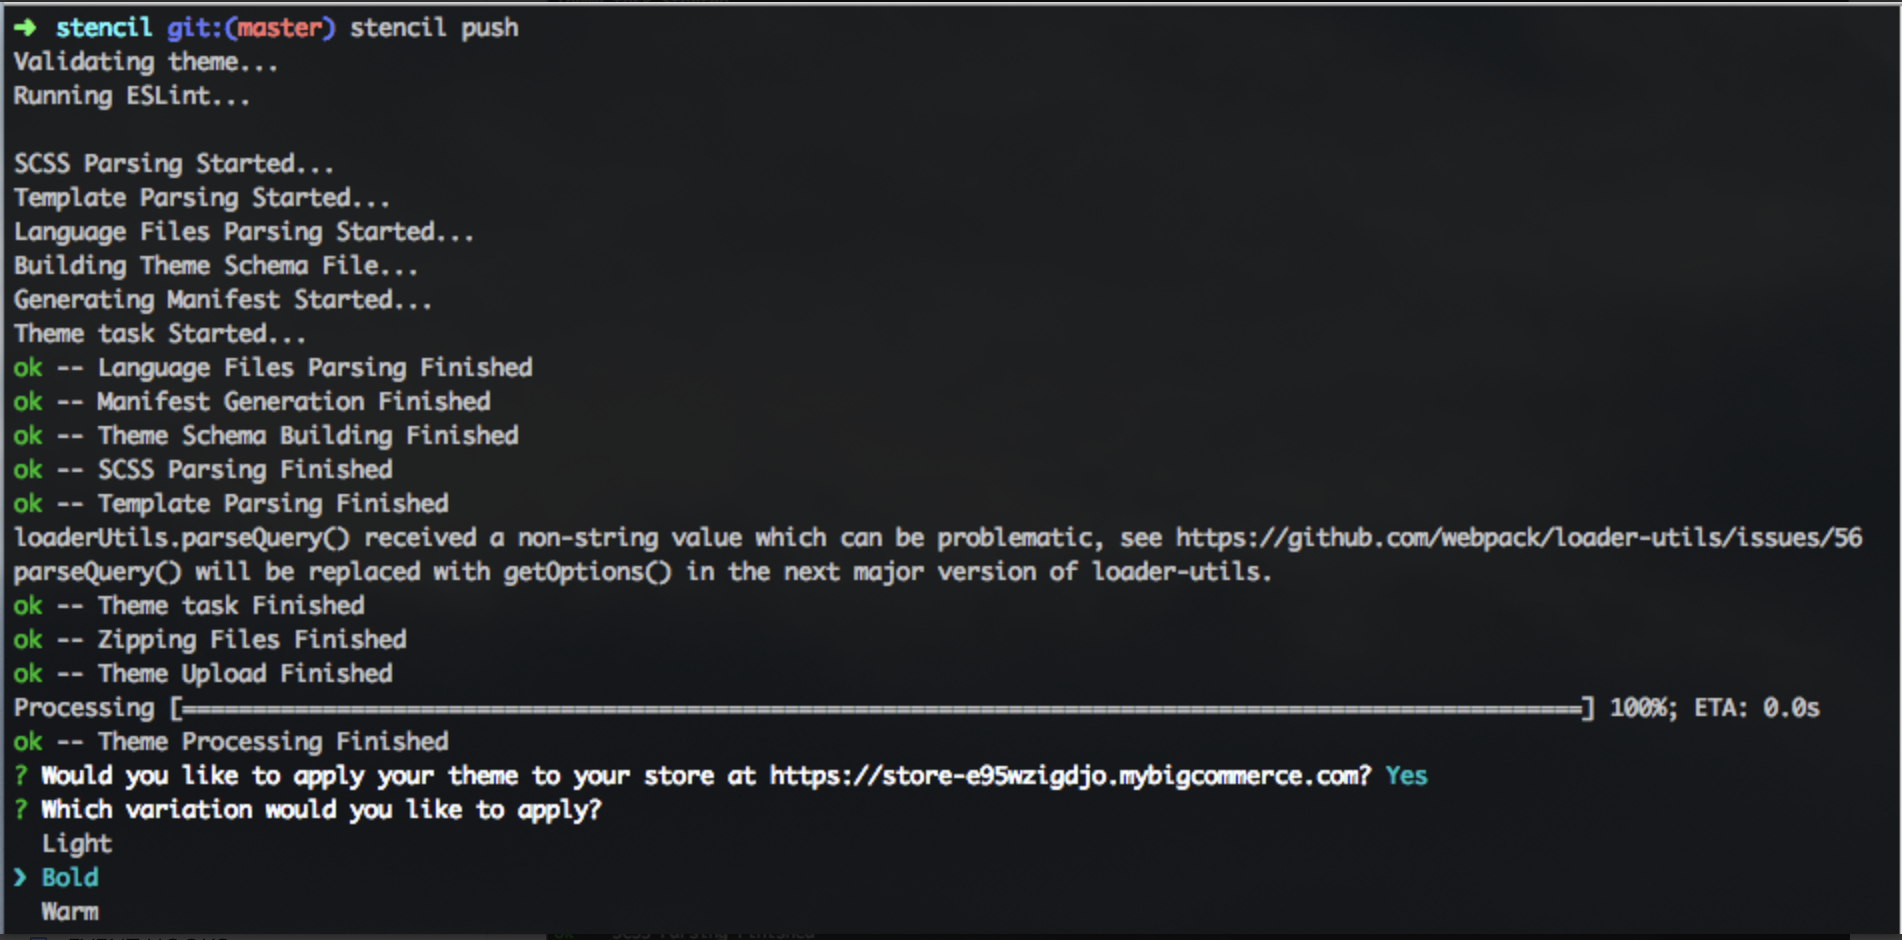
If you chose to apply the newly uploaded theme, you will receive the prompt: "Which variation would you like to apply? (Use arrow keys)"

Use your arrow keys to move the selection caret/highlight to the variation you want, and then press Enter.
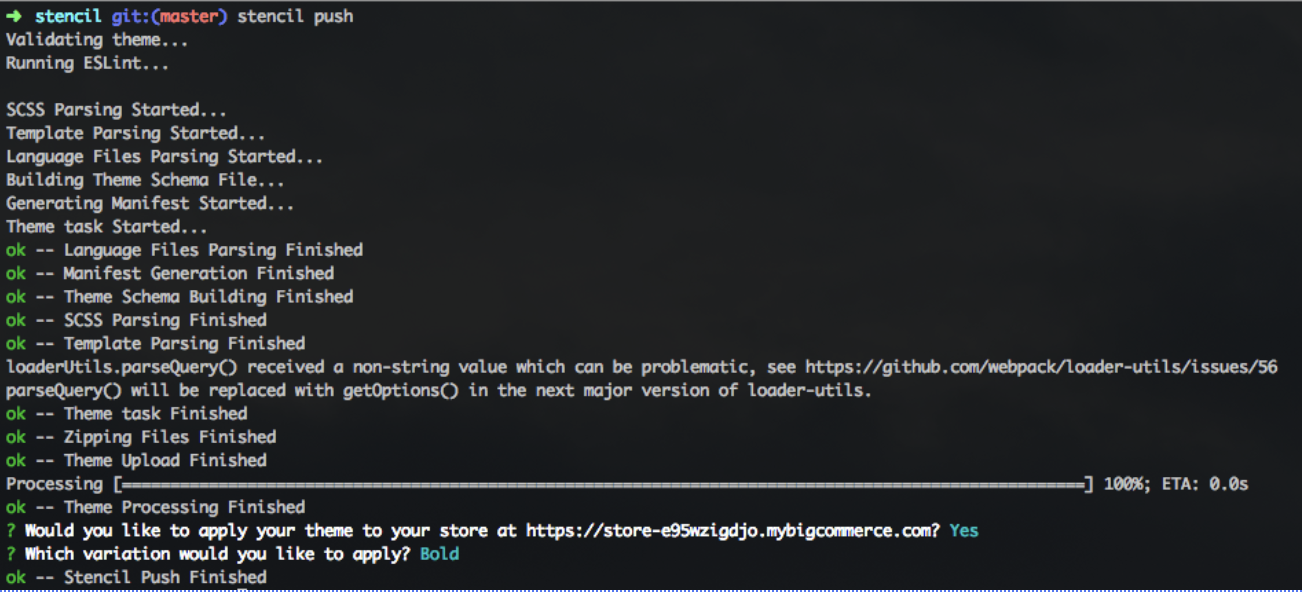
Stencil CLI will then confirm which variation is active on the storefront.

Theme quota warning
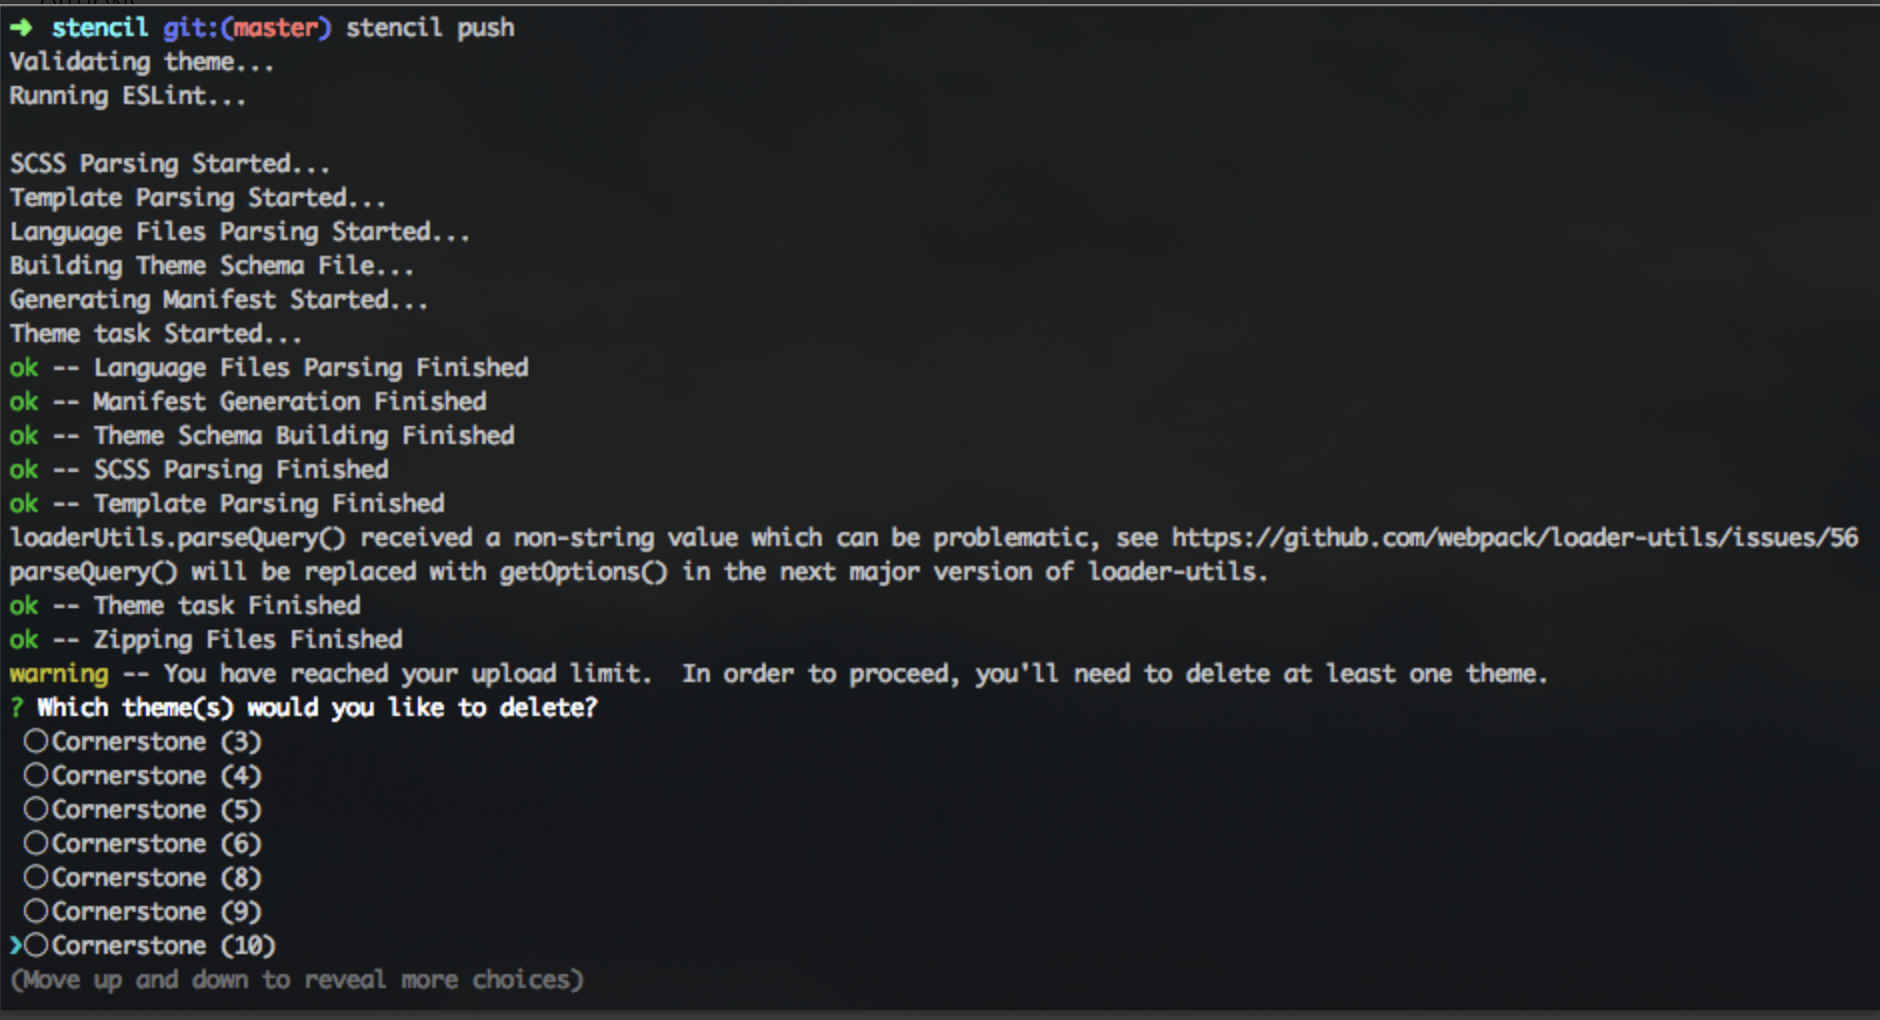
If you run stencil push when your store's My Themes section has reached its maximum of 20 themes, you will receive a prompt to select at least one existing theme for deletion.

Custom themes – which are available for selection – will have a circle to their left. Marketplace themes and the store's active theme – all of which are protected from deletion – will be flagged (Disabled).
Use your arrow keys to move the selection caret to each theme/version that you want to select. Then press the spacebar to select it. (Filled circles will indicate your selected themes/versions.)
If you are certain of your selections, you can press Enter to delete the themes.
Select carefully – no confirmation
Once you press Enter, the selected themes will be deleted immediately, with no further confirmation.
If you have any doubts – especially about deleting multiple themes/versions – it is safest to delete them through the control panel GUI. This GUI allows you to compare uploaded versions and to inspect their metadata.
Other bundling or upload errors
For any other not ok bundling or upload errors that you receive, please refer to these debugging guidelines Theme setup and sizing diagnostics in preceding sections throughout this page, or the following article titled Troubleshooting Theme Uploads.