Multi-Channel Capabilities
Since version 3.1.0, BigCommerce for WordPress is capable of managing multiple channels (and displaying different product listings for each channel) from within a single WordPress site. This makes it possible to have multiple storefronts on a single WordPress instance with BigCommerce serving as headless commerce back-end.
This article explains how to enable and make use of BigCommerce for WordPress's multi-channel capabilities. The first two sections briefly note the filters required to enable and use the functionality; then, in Plugin Example, a more in-depth demonstration with example code is provided. For longer discussion on multi-storefront use cases and additional examples, see Build a Multi-Region Storefront with BigCommerce for WordPress 3.1.0+ (opens in a new tab) on our Developer Blog (opens in a new tab)
Enabling Multiple Channels
Multi-channel capabilities can be enabled with the addition of a BigCommerce for WordPress specific filter:
add_filter( 'bigcommerce/channels/enable-multi-channel', '__return_true' );This will enable an admin to connect to multiple channels on the settings screen. The primary channel will still be used for all front-end requests unless filtered to use a different channel.
Switching Channels
Once multi-channel support is enabled and multiple channels are connected via BigCommerce settings in the WordPress admin, the channel displayed to shoppers on the front-end can be toggled with the following filter:
add_filter( 'bigcommerce/channel/current', function( $channel ) {
// add logic here to determine the channel to use
// note: replace '31' with the WordPress term_id of your connected channel
return get_term( 31, \BigCommerce\Taxonomies\Channel\Channel::NAME );
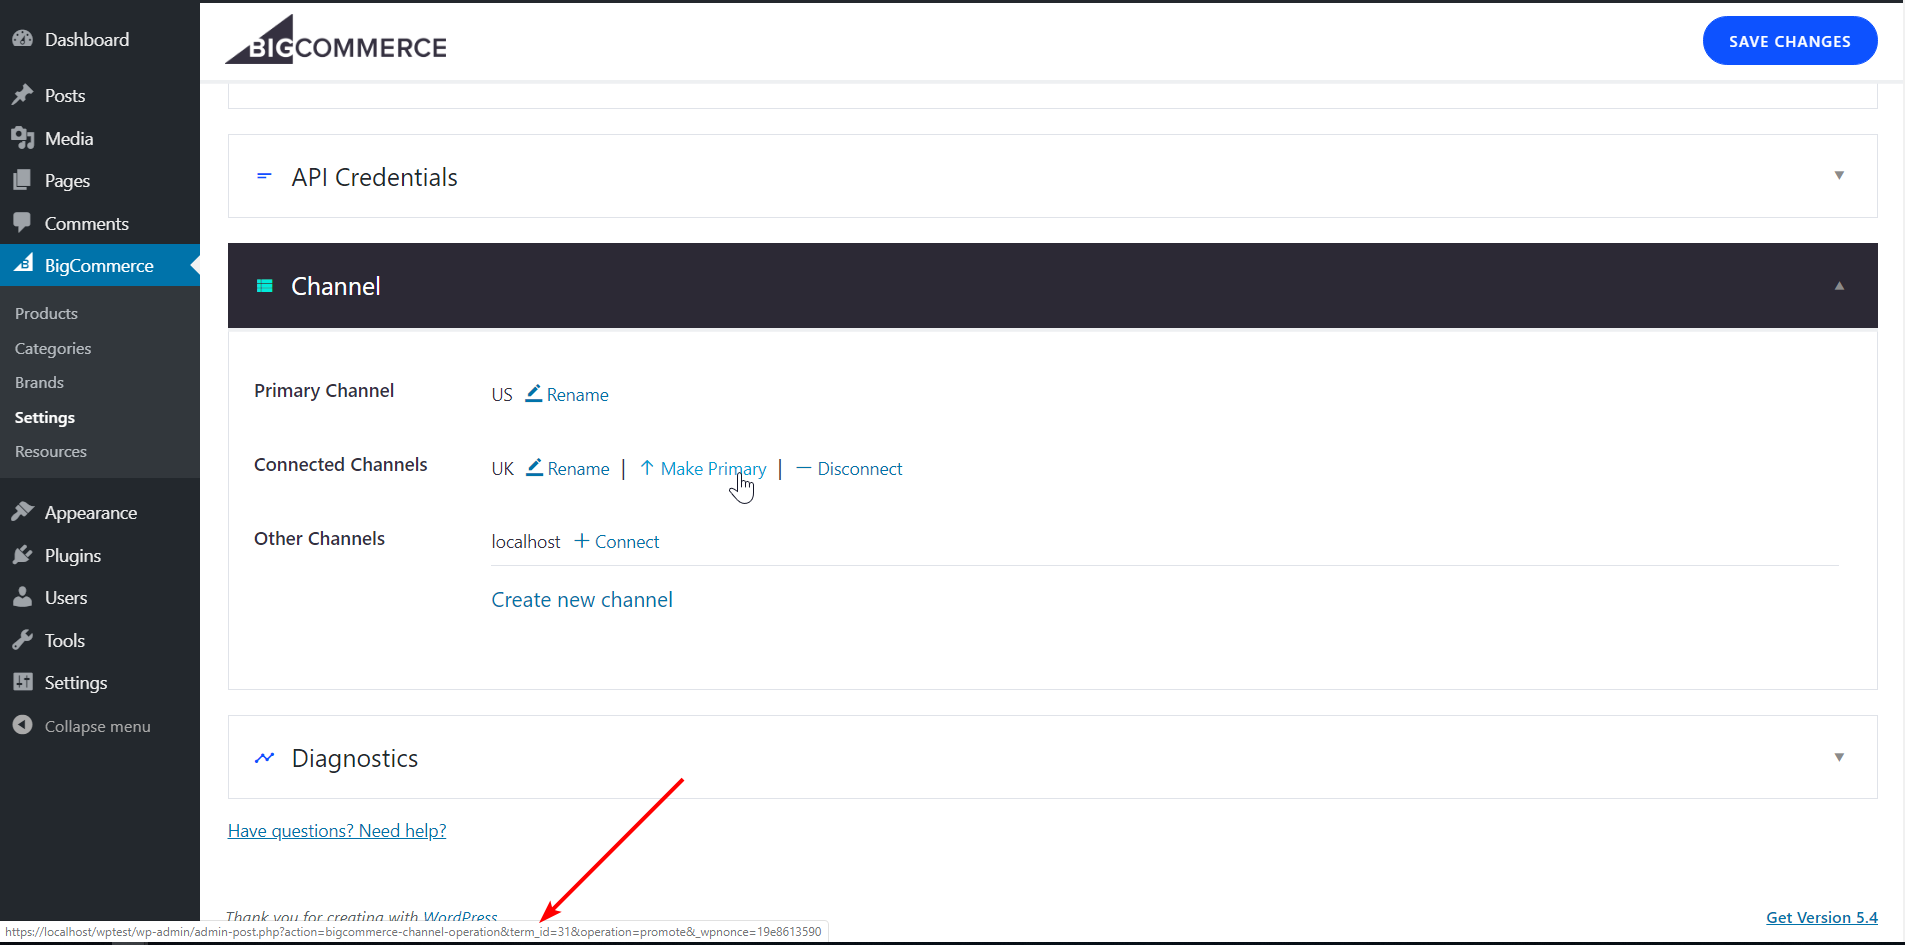
});The filter above displays the connected channel associated to the WordPress term_id passed to get_term() (31 in the example). An easy way to find your connected channel's term_id is by hovering over the Make Primary link in BigCommerce Channel Settings in the WordPress Admin (note the term_id shown in the URL indicated by the red arrow):
Plugin Example
A common use case for multiple channels and storefronts is offering differentiated shopping experiences for multiple geographic regions (ex: a UK and US storefronts with different translations, currencies, products, and pricing). With BigCommerce for WordPress's multi-channel capabilities, its possible to create a multi-region storefront using a single WordPress instance powered by a BigCommerce back-end. To demonstrate, this section provides steps to creating a simple plugin for switching channels and currency symbols via query string parameters.
Prerequisites
- Familiarity with developing WordPress plugins
- BigCommerce store with at least two channels and products in each channel
- Admin access to a WordPress instance with BigCommerce for WordPress installed
- Ability to edit WordPress instance files locally or via FTP
Step 1: Setup Directory Structure
In your WordPress instance's wp-content/plugins/ directory:
- create a subdirectory called
query-string-activation - in the
query-string-activationsubdirectory, create a file calledquery-string-region-activation.php
Once finished, the directory structure should look as follows:
├── wp-content                                       # WP instance wp-content dir
|    ├── plugins                                     # WP instance plugins dir
|    |   ├── bigcommerce                             # BigCommerce for WordPress Plugin
│    |   ├── query-string-activation                 # Example Child Plugin
│    |   |   └── query-string-region-activation.php
|    |   ├── ...
For more information on editing WordPress and plugin files, see Editing Files (opens in a new tab) (wordpress.org).
Step 2: Connect Channels
Add and connect the desired channels in WordPress Admin > BigCommerce > Settings > Channels and make note of the term_id in the URL when hovering over Make Primary:
.png)
In the example screenshot above, we've created and connected two channels:
- a
USchannel withterm_id32(primary), and - a
UKchannel withterm_id31
The term_ids for your channels will probably be different
Step 3: Add the Plugin Code
Now that we've connected two channels and made note of the term_ids, we're ready to begin coding.
Using your favorite code editor, copy and paste the following source code into query-string-region-activation.php:
<?php
/**
 * Plugin Name: BC4WP: Query String Region Activation
 * Plugin URI: http://www.bigcommerce.com/wordpress
 * Description: Proof of concept for region activation by query string
 * Version: 0.5
 * Author: BigCommerce
 * Author URI: http://www.bigcommerce.com
 */

// Enable multi channel capabilities
add_filter( 'bigcommerce/channels/enable-multi-channel', '__return_true' );

// If ?region=uk
if ( $_GET[ 'region' ] !== 'us' && ($_GET[ 'region' ] === 'uk' || strpos($_SERVER['HTTP_REFERER'], 'region=uk') !== false) ) {

	// switch to the uk channel
	add_filter( 'bigcommerce/channel/current', function( $channel ) {

        // NOTE: change 31 to the  term_id of your channel
		return get_term( 31, \BigCommerce\Taxonomies\Channel\Channel::NAME );
	}, 10, 1 );

	// set currency code to GBP
	add_filter( 'pre_option_' . 'bigcommerce_currency_code', function() {
		return 'GBP';
	}, 10, 0 );

	// Set currency symbol to £
	add_filter( 'pre_option_bigcommerce_currency_symbol', function() {
		return '£';
	}, 10, 0 );
}- replace
31inget_term()above with theterm_idof your channel - change
uk,GBP, and£to the country code and currency corresponding to your channel, as desired
Here's what's happening in the example code:
- First enable multi-channel capabilities with
add_filter( 'bigcommerce/channels/enable-multi-channel', '__return_true' ); - Then, there's an
ifstatement to check the value of the?region=query string from the browser:- If the value is NOT
usand ISuk, filter to channel withterm_id=31(UK in this case)- change currency code to
GBP(British pound sterling). - change the currency symbol to
£
- change currency code to
- If the value is NOT
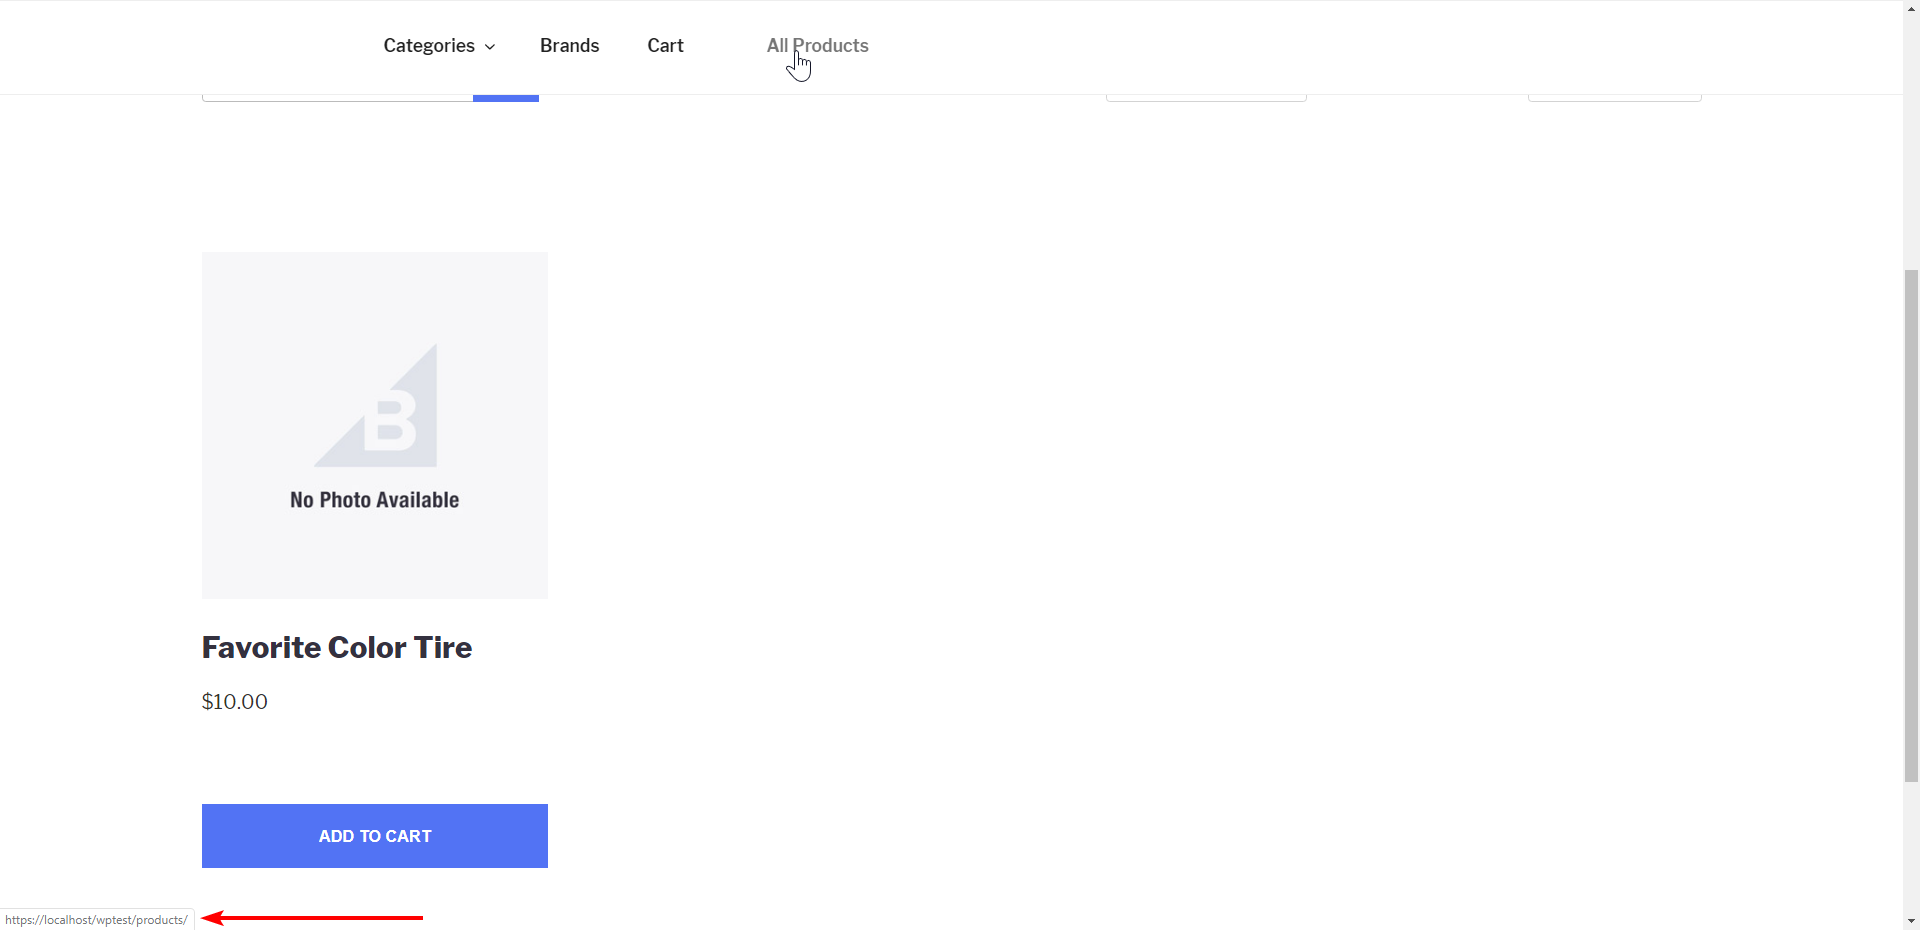
Once everything is configured correctly, we can test by navigating to All Products (/products/) on the WordPress storefront (note the product and currency symbol):
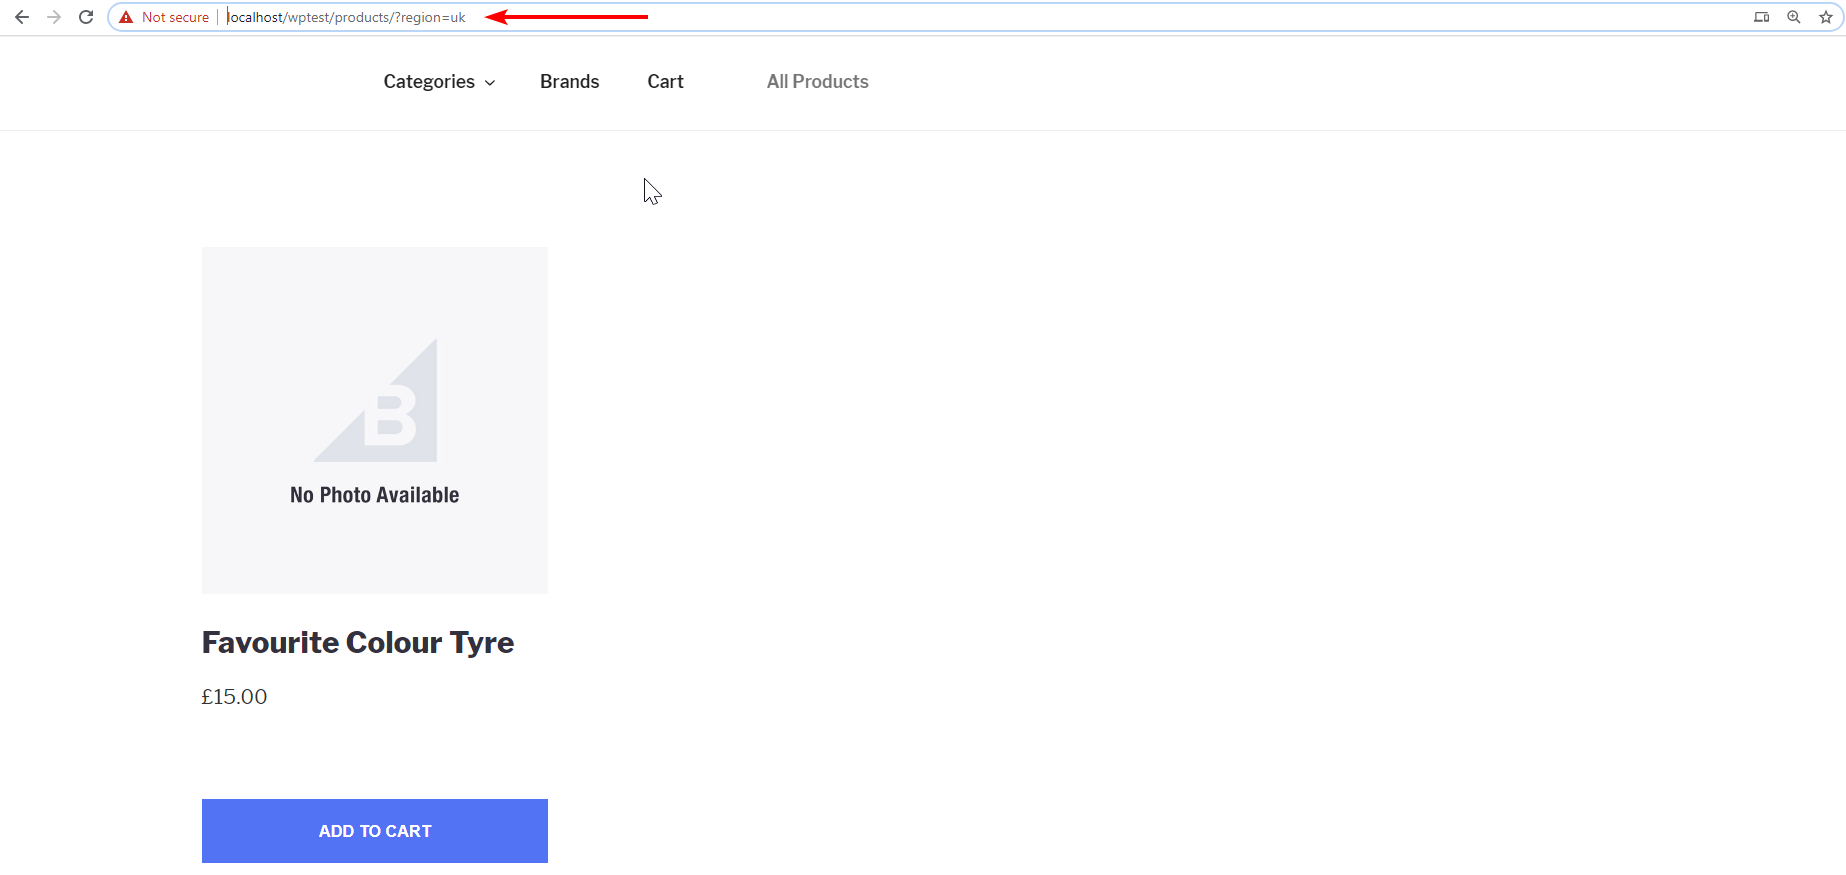
Now let's switch the channel and currency symbol by passing in region=uk in the query string (notice product and currency symbol have changed):
Developing Further
Obviously, the example plugin above is simple and not super useful as-is; however, its a starting point to creating rich, multi-storefront shopping experiences.
For additional implementation ideas (such as adding a region selection dropdown and switching regions based on a shopper's geo IP), checkout how to Build a Multi-Region Storefront with BigCommerce for WordPress 3.1.0+ (opens in a new tab) on our developer blog.
FAQ
How does BigCommerce for WordPress sync changes made to products in BigCommerce? In the past, if you made a change to a single product you would have to re-sync your entire catalog to copy the changes to WordPress. Now each product has a Sync button in the admin area so you can initiate a sync on a given product.
What is the taxonomy for storing channels? Most stores will only have one, but a store with multi-channel enabled may have many. The taxonomy’s UI is hidden, and it is only exposed during onboarding (when selecting the initial channel) and in the Channel Settings section when multi-channel is enabled. All products are associated with a channel term on import.
Resources
BigCommerce
- BigCommerce for WordPress Repo (opens in a new tab) (GitHub)
- New Release: BigCommerce for WordPress 3.1.0 (opens in a new tab) (BigCommerce Dev Blog)
- Build a Multi-Region Storefront with BigCommerce for WordPress 3.1.0+ (opens in a new tab) (BigCommerce Dev Blog)
Other Resources
- Editing Files (opens in a new tab) (wordpress.org)